Last updated: October 25, 2026
Key Takeaways
- Stop the water, contain the leak, and cut power if water is near electrical equipment.
- Identify whether the problem is a pressurized leak or a drain backup before choosing a repair.
- Use only a short-term patch that does not hide the real defect.
- A drain backup usually points to a blockage, vent issue, or main-line obstruction.
If a pipe is spraying, a toilet is overflowing, or a drain is backing up into the house, the first job in Emergency Plumbing Repairs — The Complete Guide is to stop the water and limit damage. Then the emergency plumbing repair depends on the cause: a failed shutoff valve, a clogged drain, a burst supply line, a water heater leak, or a sewer backup.
What to do in the first 10 minutes
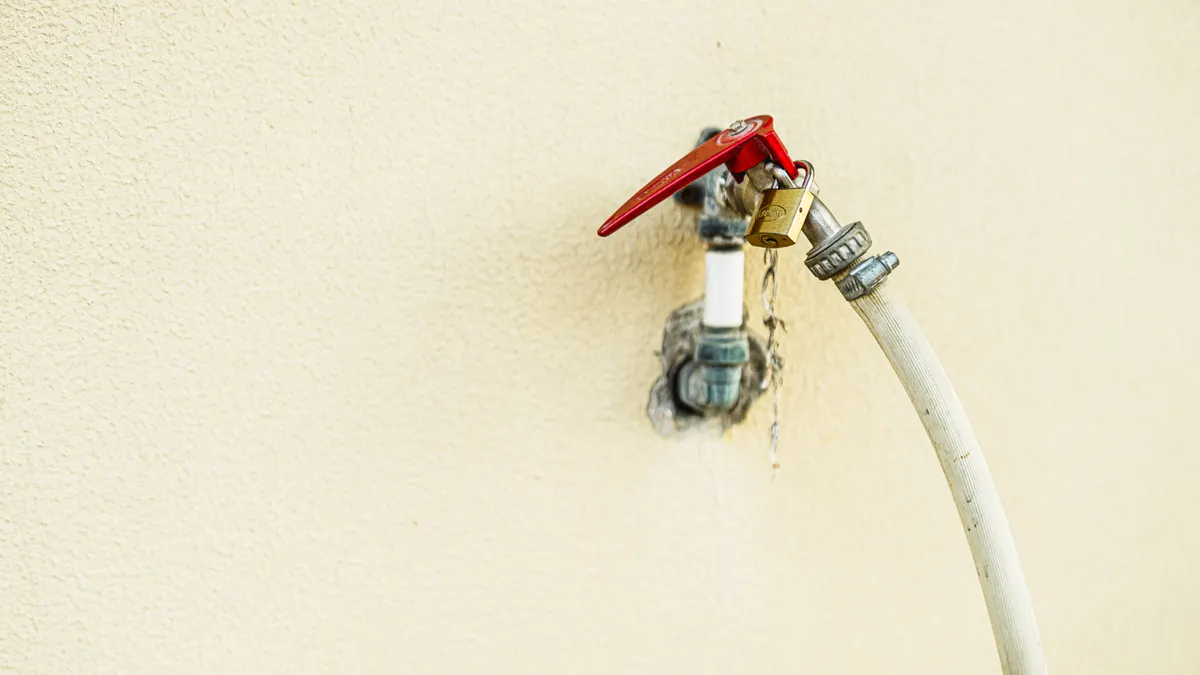
The right first move is to shut off the water, contain the leak, and cut power if water is near electrical equipment. A small leak can become a ceiling collapse in under an hour if it keeps feeding hidden cavities, so speed matters more than perfect diagnosis.
- Find the nearest shutoff. Check under the sink, behind the toilet, at the fixture, or at the appliance valve. What to check: the handle should turn fully and the water should stop within seconds. What not to do: force a stuck valve hard enough to break the stem.
- If you cannot isolate the fixture, close the main shutoff. This is usually near the meter, where the line enters the house, or in a basement utility area. What to check: faucets should lose pressure after 10 to 30 seconds. What not to do: leave the main half-open, which can worsen hammering and seepage.
- Turn off electricity to wet areas if water is near outlets, cords, or equipment. What to check: the breaker labeling and whether the floor is visibly wet around receptacles. What not to do: stand in water to reach a panel.
- Contain the flow with buckets, towels, and a shallow pan. What to check: water should be directed away from trim, flooring seams, and subfloor openings. What not to do: tape plastic over a growing ceiling bulge; that can trap more water and make the break larger.
- Relieve pressure at the nearest faucet. Open a cold tap downstream of the shutoff. What to check: flow should taper off quickly. What not to do: open every fixture in the house and forget one drain or hose bib still under pressure.
- Document the damage with photos. What to check: the source, the spread, and any visible model labels on the failed part. What not to do: wait until cleanup starts; wet surfaces and stains are easier to understand before anything is moved.
- Call for emergency service if the leak is active, sewage is present, or the shutoff fails. What to check: whether the water is clear, gray, or foul-smelling. What not to do: keep using drains, toilets, dishwashers, or washing machines while the system is compromised.
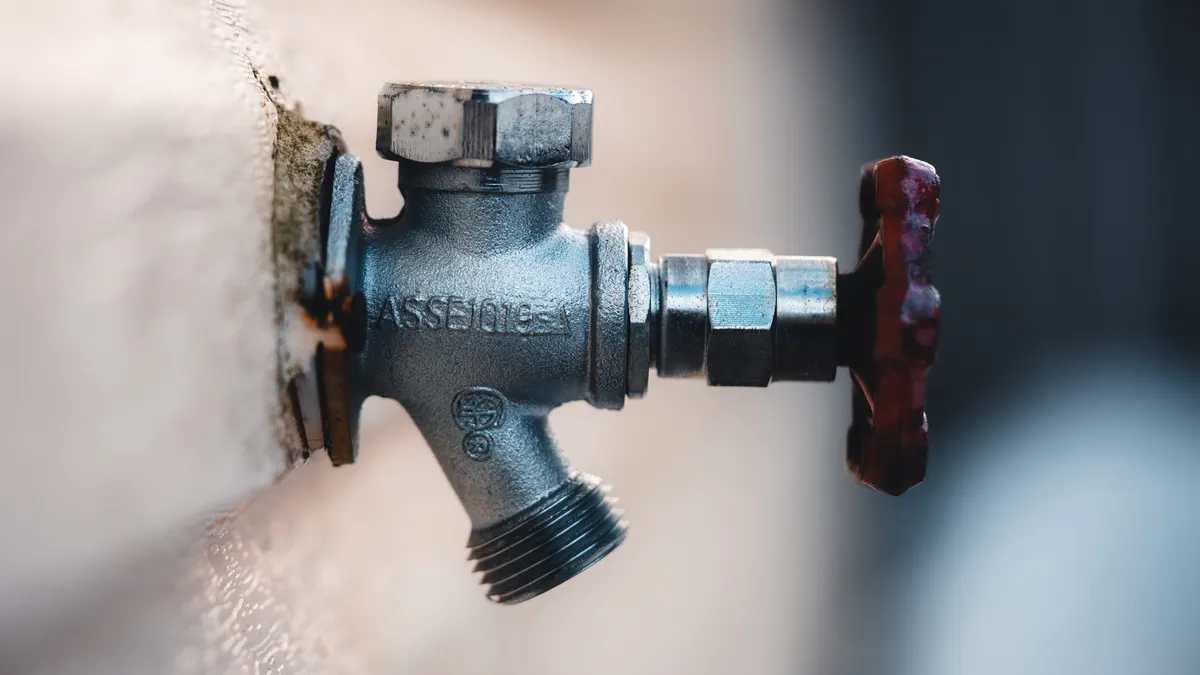
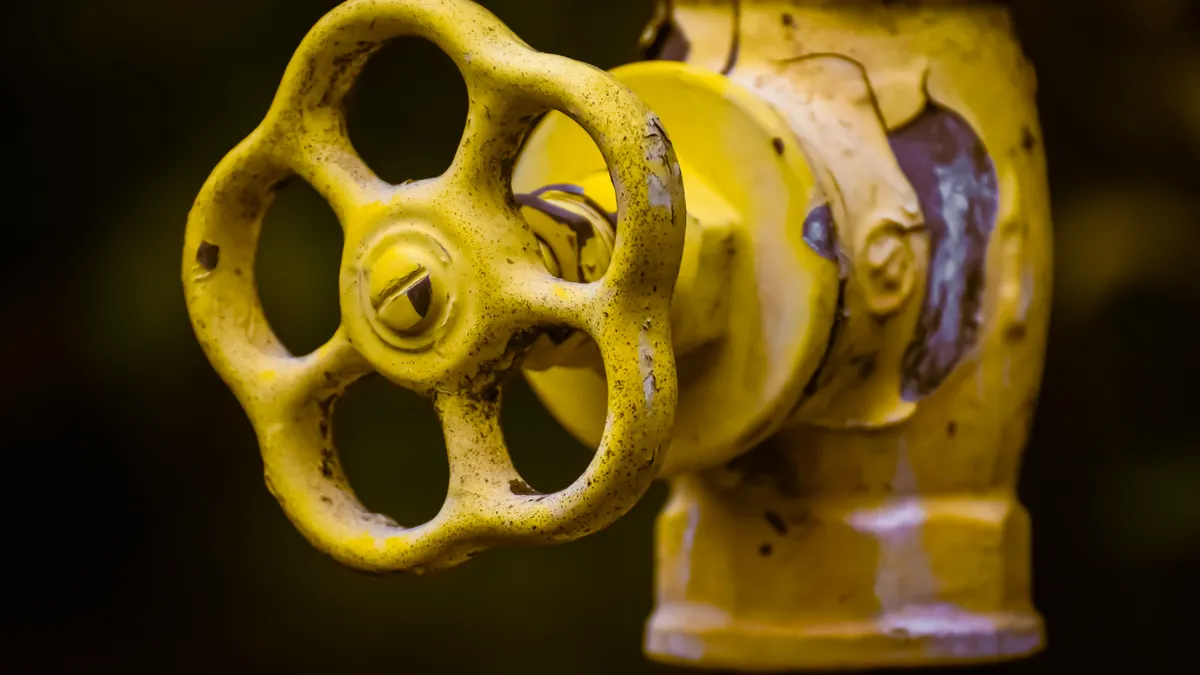
The key detail here is the shutoff valve — notice whether the handle is quarter-turn, multi-turn, or a round wheel. A quarter-turn ball valve usually closes fast; an older gate valve may take several turns and may seize from mineral buildup.
| Situation | Best immediate action | Typical time target | Risk if delayed |
|---|---|---|---|
| Burst supply line | Close main shutoff | Under 1 minute | Flooding, soaked insulation, warped flooring |
| Overflowing toilet | Stop the fill and close toilet valve | Under 2 minutes | Bathroom floor damage, seepage into subfloor |
| Leak under sink | Close fixture valve | Under 2 minutes | Cabinet swelling, mold in toe-kick area |
| Ceiling drip | Close nearest water source and isolate area | Under 5 minutes | Stained drywall, collapse of saturated sheetrock |
| Sewer backup | Stop water use and call for service | Immediately | Contamination and sanitation hazard |
This is the fastest workable answer: stop the water, cut power if needed, and call a plumber if the leak is active or the system is backing up. It is not a cure for a recurring leak, and it is not safe to improvise on gas-fired water heaters, corroded shutoffs, or a sewage overflow; consult a licensed professional and follow manufacturer guidance.
Which emergency is it: leak, clog, or backup?
The right repair starts with the pattern of the water, because a clean, pressurized leak looks nothing like a drain problem. A pinhole in a copper line leaves a fine spray or a wet ring in a wall cavity; a blocked sewer line usually shows slow drains first, then multiple fixtures acting up within the same 10 to 30 minutes.
- Look at the water source. What to check: is water coming from a supply pipe, a fixture base, a drain opening, or the ceiling below? What not to do: assume every puddle came from the nearest visible pipe.
- Check whether the water is under pressure. What to check: a pressurized leak keeps flowing until shut off; a drain leak often slows after fixtures stop running. What not to do: keep testing by opening taps when the source is unknown.
- Notice the color and smell. What to check: clear water usually points to supply or condensation; gray water suggests a drain issue; foul odor points toward sewer gas or backup. What not to do: sniff directly above a suspected sewer opening for long periods.
- Test one fixture at a time after isolation. What to check: whether the toilet, shower, sink, or washer is tied to the problem. What not to do: run multiple fixtures at once, which hides the culprit.
- Listen for hidden clues. What to check: hissing in a wall, gurgling in a tub, or water running when all fixtures are off. What not to do: ignore a meter that moves when nothing is on.
- Decide whether the issue is localized or system-wide. What to check: one fixture only versus every drain in the house. What not to do: treat a whole-house sewer symptom like a simple sink clog; consult a plumber if the pattern is unclear or repeats. See EPA drainage and sewer guidance and local utility advice.
A leak in one fixture usually stays local. A clog in one branch line often affects one room. A main drain or sewer problem spreads to the lowest fixtures first, often a basement shower, floor drain, or first-floor toilet.
| Symptom | Likely cause first | Visible clue | Urgency |
|---|---|---|---|
| Water spraying from a pipe | Failed supply line or loose compression fitting | Active spray, wet wall, high-pressure flow | Immediate |
| Toilet overflows once and stops | Clog in bowl or trap | Water rises then stalls in the bowl | High |
| Multiple drains gurgle | Main line restriction | Bubbling in tub or shower when toilet flushes | High |
| Slow leak under sink | Trap, supply line, or shutoff packing nut | Drips only when fixture runs | Moderate to high |
| Sewage smell from floor drain | Dry trap, blocked vent, or backup | Odor without obvious standing water | High |
The detail people miss is the pattern across fixtures. A single slow sink is not the same problem as three slow drains on the same floor. That difference changes the repair from a plunger job to a main-line inspection.
How to stop common leaks in Emergency Plumbing Repairs without making them worse
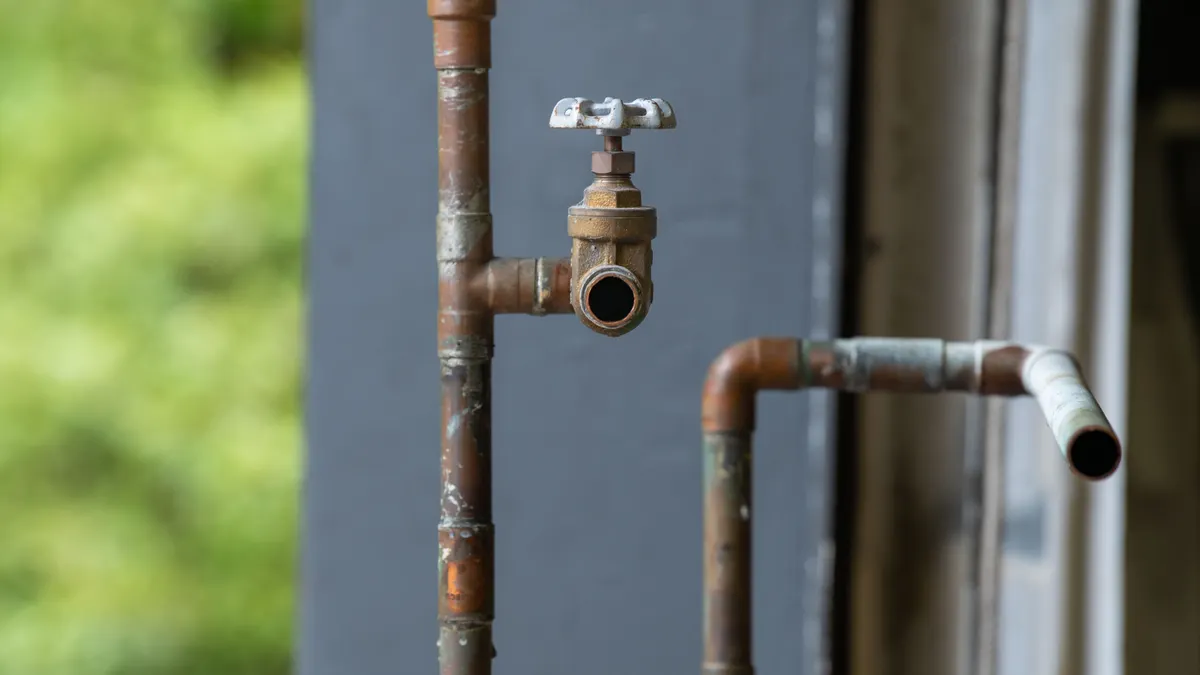
The safest temporary fix in Emergency Plumbing Repairs is to isolate the source, reduce pressure, and use a short-term patch only when it does not mask the real defect. That matters because a clamp or tape wrap can hold for hours on a clean, straight pipe, but it is a poor answer for a corroded elbow, split ABS, or a loose threaded connection.
- For a loose supply connection, snug the fitting lightly. What to check: whether the drip comes from the nut, not the pipe body. What not to do: overtighten compression fittings; that can deform the ferrule and make the leak worse.
- For a failing braided hose, replace the hose, not the washer. What to check: bulges, frayed outer braid, or corrosion at the crimp. What not to do: keep reusing a hose with visible swelling.
- For a pinhole on copper or galvanized pipe, apply a temporary repair sleeve or epoxy wrap. What to check: that the pipe surface is dry and cleaned first. What not to do: wrap over active spray and expect it to cure properly; consult a plumber if the pipe is corroded or inaccessible.
- For a PVC or ABS drain crack, use a rubber repair coupling if the break is straight and accessible. What to check: pipe diameter and enough straight length for the coupling clamps. What not to do: patch a crushed section hidden inside a wall as a permanent fix.
- For a dripping shutoff valve, tighten the packing nut a small amount. What to check: whether the drip is around the stem. What not to do: crank the nut so tight the handle binds.
- For a toilet base leak, stop using the toilet and inspect the wax ring area after shutting off supply. What to check: moisture at the flange, rocking at the bowl, or water only during flushes. What not to do: caulk around the base and call it done; that can trap leaks under the floor.
- For a water heater leak, shut off the cold inlet and power source, then inspect the relief valve area. What to check: the source is the tank, valve, or nearby fittings. What not to do: seal the temperature-and-pressure relief outlet; consult a qualified technician and follow the manufacturer’s instructions.
The key visual clue is the shape of the failure. A straight split in plastic pipe can be repaired temporarily with a mechanical coupling; a brittle, spidered fracture or a corroded metal joint usually means the section needs replacement.
| Temporary fix | Works best on | Approximate use window | Main limitation |
|---|---|---|---|
| Pipe repair clamp | Straight pipe leaks | Short-term, until permanent repair | Won’t fix rotten pipe or hidden corrosion |
| Epoxy putty | Small pinholes or seepage | Short-term to medium-term | Needs dry surface and cure time |
| Rubber coupling | Straight drain pipe cracks | Short-term to medium-term | Requires room to fit the clamp |
| Packing nut adjustment | Valve stem drip | Immediate stopgap | May fail again if the stem is worn |
| Hose replacement | Flexible appliance lines | Permanent if installed correctly | Must match thread size and length |
Temporary fixes are the right choice when the goal is damage control before a proper repair. They are wrong for active sewage leaks, burst supply lines behind walls, and anything involving a water heater tank shell. In those cases, the patch is usually a delay tactic, not a repair.
Why a drain backup needs a different repair than a pipe leak
A drain backup is usually a blockage, vent problem, or main-line obstruction, and the repair has to clear the system, not just the nearest trap. If water backs up in a tub when the toilet flushes, the issue is often farther down the line than the fixture you can see.
- Stop using all water in the affected branch. What to check: whether the backup appears in a tub, shower, floor drain, or toilet. What not to do: keep flushing to “push it through.”
- Try a plunger on the affected fixture. What to check: a partial blockage should respond to several firm plunges with a good seal. What not to do: use a tiny sink plunger on a toilet or vice versa.
- Use a toilet auger or hand snake for a local clog. What to check: resistance that clears within a few feet. What not to do: force a snake through a porcelain trap aggressively enough to scratch or crack it.
- Check whether multiple fixtures are affected. What to check: if the shower, toilet, and sink all respond badly, the problem may be in the main line. What not to do: keep alternating fixtures and hoping one will “prime” the line.
- Inspect cleanout access if available. What to check: whether a cleanout cap can be safely removed and whether water stands behind it. What not to do: remove a cleanout without towels, a bucket, and a clear path for discharge.
- Call for drain cleaning or sewer service if the blockage is beyond the branch line. What to check: recurring backups, gurgling, and sewage odor. What not to do: keep pouring chemical drain openers into a system that may already be partially full.
The difference between a correct and incorrect response is visible in the water movement. A corrected branch clog gives a quick drop in bowl level and normal drain sound; a wrong fix leaves the same slow swirl, then the same backup after the next flush.
| Symptom pattern | Likely repair method | Tool type | When it is probably not enough |
|---|---|---|---|
| One sink drains slowly | Plunger or hand snake | Hand tool | If trap is clear and blockage is deeper |
| Toilet rises and falls slowly | Toilet auger | Hand tool | If water returns in tub or shower |
| Tub gurgles when toilet flushes | Main or branch restriction | Professional drain cleaning | If several fixtures are involved |
| Sewage backs up through floor drain | Main sewer issue | Professional inspection and cleaning | If backup repeats after temporary clearing |
| Slow drains plus sewer odor | Vent or main problem | Inspection and correction | If odor remains after trap is filled |
A generic article often says “use a plunger” and stops there. That misses the key distinction: a plunger fixes local movement, but it does not repair a collapsed pipe, root intrusion, or a blocked main. If the same backup returns after 24 hours, the line needs a proper diagnosis, not another round of plunging.
What a plumber will usually inspect, replace, or clean
A proper emergency visit starts with isolation, then diagnosis, then the smallest repair that actually solves the fault. The aim is not to replace every visible part; it is to find the failed component, which may be a $10 washer, a corroded angle stop, a trap, or a failed section of pipe hidden behind finished walls.
- Identify the source and shutoff points. What to check: main valve location, fixture valves, and appliance disconnects. What not to do: leave a stuck valve untouched and hope the repair can begin elsewhere.
- Inspect the visible piping and fixtures. What to check: corrosion, staining, cracked housings, loose nuts, and water trails. What not to do: cover the damaged area before it is documented.
- Test water pressure and flow at the fixture. What to check: whether pressure is normal or weak after shutoff and reset. What not to do: assume a weak stream is unrelated to the emergency.
- Open access where needed. What to check: whether a wall panel, ceiling opening, or vanity panel is necessary to reach the repair point. What not to do: cut finishes randomly without confirming the route.
- Replace worn valves, hoses, traps, or seals. What to check: that the new part matches diameter, thread type, and temperature rating where relevant. What not to do: mix incompatible fittings or reuse brittle washers.
- Clear the line if the fault is blockage, scale, or roots. What to check: whether the drain opens fully after cleaning and stays open under normal use. What not to do: rely on chemicals to remove a mechanical obstruction.
- Pressure-test or run water after the repair. What to check: no new dripping, no seepage at joints, and normal drain sound. What not to do: leave without a final check while surfaces are still wet.
The most useful visual cue is the fresh joint versus the old one. A correct replacement has clean threads, square seating, and dry paper towels placed under the connection for a few minutes without spotting. An incorrect repair often looks “dry enough” for a moment, then shows a ring at the nut or a hidden drip along the underside of the pipe.
| Common emergency part | Typical function | Observable failure sign | Replacement note |
|---|---|---|---|
| Angle stop valve | Shuts off sink or toilet supply | Won’t close, leaks from stem | Often replaced if seized or corroded |
| Braided supply line | Feeds faucet or toilet | Bulging, fraying, dripping at crimp | Replace as a unit |
| Wax ring | Seals toilet to flange | Water at base during flush | Replace if toilet rocks or leaks |
| P-trap | Blocks sewer gases and catches debris | Drips under sink, odor, clog | Clean or replace depending on damage |
| Relief valve | Protects water heater from excess pressure | Discharge or active leak | Replace only to code and manufacturer specs |
This is where trade-offs matter. A quick repair can restore service fast, but a badly corroded system may need a larger section replaced to avoid a second failure next week. That is not over-selling; it is the difference between fixing the leak and fixing the reason the leak happened.
Which repairs are safe to try and which ones are not for a homeowner in Emergency Plumbing Repairs?
The safe rule is simple: handle shutoffs, visible clogs, and accessible hose or valve replacements, but leave hidden leaks, sewer backups, and gas-adjacent work to a licensed plumber. That line matters because a mistake on a water heater, main sewer, or concealed supply pipe can turn a water problem into structural damage or a code issue.
- Safe: closing a main or fixture shutoff. What to check: the water stops and the handle moves normally. What not to do: use excessive force on a frozen valve.
- Safe: replacing an obvious appliance hose. What to check: matching thread size, gasket seating, and no twist in the hose. What not to do: reuse an old washer on a pressurized connection.
- Safe: plunging a single clogged toilet or sink. What to check: a localized blockage that responds within a few attempts. What not to do: plunge a fixture if sewage is already rising elsewhere.
- Not safe: opening a wall for an unknown leak without confirming the path. What to check: stain patterns, pipe route, and moisture source. What not to do: cut a large section of drywall blindly.
- Not safe: tampering with a water heater relief system or gas connection. What to check: model label and shutoff points. What not to do: bypass a safety valve or ignore gas odor.
- Not safe: using chemical drain openers in a full or nearly full line. What to check: whether the water level can drain first. What not to do: pour chemicals into a system that may splash back.
- Not safe: ignoring electrical exposure. What to check: outlets, cords, and nearby appliances. What not to do: keep power on to a wet circuit.
The most honest limitation of DIY emergency work is that it buys time, not certainty. A homeowner can often stop water in 5 minutes and stabilize the scene, but a hidden leak inside a wall, a broken sewer line, or a corroded shutoff usually needs tools and parts that are not guesswork.
| Do it yourself | Call a plumber |
|---|---|
| Shut off water | Burst pipe behind finished wall |
| Replace a supply hose | Sewer backup or repeated gurgling |
| Plunge one fixture | Toilet base leak with floor damage |
| Tighten a packing nut slightly | Stuck main shutoff or broken valve stem |
| Dry the area and document damage | Water heater leaking from the tank body |
The judgment call is not about pride; it is about failure mode. If the problem is visible, isolated, and mechanical, a homeowner may be able to stabilize it. If the problem is hidden, pressurized, or contaminated, the correct move is to stop use and bring in a professional.
What to do after the water stops
The right follow-up is to dry the area, verify the repair, and watch for delayed damage over the next 24 to 72 hours. Water that appears “gone” can still be trapped in insulation, under laminate flooring, or inside a cabinet toe-kick, and that hidden moisture is what causes swelling and odor later.
- Run fans and open ventilation where safe. What to check: airflow across floors, cabinets, and baseboards. What not to do: aim a fan directly at a live electrical hazard.
- Remove standing water promptly. What to check: the floor, subfloor edges, and inside cabinet bottoms. What not to do: leave towels packed under fixtures for days.
- Check the repaired point again after 15 to 30 minutes. What to check: fresh drips, damp paper towels, or renewed staining. What not to do: assume the leak is fixed because it is quiet.
- Watch the material around the leak. What to check: swollen particleboard, peeling paint, warped drywall, or loose tile grout. What not to do: install trim or close access panels before the area is dry.
- Test normal fixture operation one at a time. What to check: flush, drain, refill, and pressure behavior. What not to do: put the whole house back into full use at once if the repair was marginal.
- Schedule remediation if needed. What to check: persistent odor, soft flooring, or staining after drying. What not to do: ignore moisture because the visible puddle is gone.
A useful visual standard is simple: repaired fixtures should stay dry at the connection, and the surrounding materials should be dry to the touch and not cool or damp after the first drying cycle. If a wall, cabinet base, or floor edge still feels wet after 24 hours of airflow, the moisture source may not be fully resolved.
For further technical guidance, the U.S. Environmental Protection Agency’s mold and moisture resources and the International Association of Certified Home Inspectors’ plumbing articles are good starting points. For drain and sewer safety, local utility guidance and manufacturer instructions on the fixture or appliance are also worth checking before any repeat use. See the EPA’s mold and moisture guidance, IICRC-style drying principles, and your local utility’s sewer advisories.
The bottom line is plain: emergency plumbing repairs are about control first, correction second. Stop the water, identify whether the problem is a leak or a backup, use only the smallest safe temporary fix, and treat repeated symptoms as a sign that the real failure is still in the line.
Drafted with AI; not yet reviewed by a person.